

So you’ve decided to try growing your own shiitake mushrooms – congratulations! Growing shiitake mushrooms is a fulfilling experience that truly pays dividends over time.
In this ultimate guide to growing shiitake mushrooms, we’ll be walking you through everything you need to know to grow top-grade shiitake.
If you have ever tried growing oyster mushrooms, or another beginner-friendly strain, shiitake mushrooms are the perfect next step to levelling up your mushroom growing resume.
Whilst these mushrooms can be more challenging to get started with, we can assure you that the extra preparation and effort is totally worth it. Plus, with this guide at hand, we hope that we can answer any questions you may have and help you produce the best possible results.
If you would prefer to watch a video guide, check out our how-to video below!
An Overview of the Shiitake Mushroom
Native to East Asia, Shiitake Mushrooms (also known as Lentinula edodes) are edible mushrooms that have become synonymous with Japanese cuisine.
Around 83% of the World’s Shiitakes are produced in Japan but are still cultivated all around the world.
Shiitake mushrooms (and the wider lentinula genus) are classified as an agaric mushroom – a type of mushroom characterized by the presence of a mushroom cap that is distinct from a stalk and gills underneath the cap.
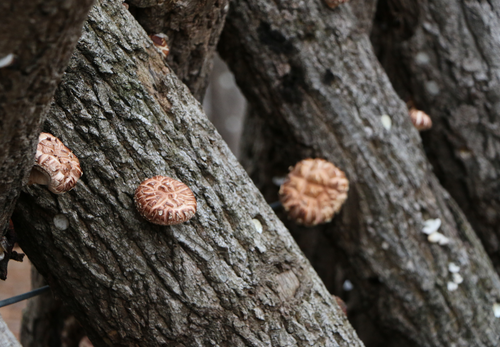
In appearance, they vary from tan to dark brown in colour with mushroom caps that grow to 5-10cm in diameter. “Shiitake” meaning “mushroom of the shii” (of the oak tree) in Japanese, is a reflection of the species most commonly being found growing on oak or similar hardwood trees when found in the wild. They have been cultivated for over 1000 years and have become a staple in East Asian cuisines.
Whilst popularity and global demand have increased over recent years, purchasing fresh shiitake mushrooms in your local supermarket can sometimes be difficult, expensive, and may not always be the easiest item to find.
Growing shiitake mushrooms is a popular way to enjoy these wonderful fungi and is an incredibly cost-effective way to do so!
Did you know?The shiitake mushroom goes by a few interesting names:
- sawtooth oak mushroom
- black forest mushroom
- black mushroom
- golden oak mushroom
- oakwood mushroom
So, Why Grow Shiitake Mushrooms?
Well, first of all – why not?!
Shiitake (in our arguably biased opinion) are some of the most delicious and versatile mushrooms around, and fit hand in glove to so many of our favourite dishes.
The deep, savoury flavour of these mushrooms makes them so versatile and offer a perfect meat alternative for those looking to reduce or omit animal products from their diet.
Our taste buds aside, shiitake actually has a ton of benefits for your health, your harvest, and if you plan to sell them – your wallet.
Let’s dive in.
They have amazing health benefits
Shiitakes are really good for you.
They are considered a medicinal mushroom – and for good reason – they contain a variety of compounds, vitamins and minerals shown to help fight cancer, improve heart health and boost the immune system.
Studies have shown that the polysaccharides, terpenoids, and lipids found in the deciduous fungi can result in a boosted immune system, lowered cholesterol levels and improved well-being.
Shiitake contain three key cholesterol-lowering compounds: Eritadenine, sterols, and beta-glucans.
Whilst you don’t need to know too much about how these compounds work, research has shown that the consumption of shiitake mushrooms has been shown to improve heart health by lowering cholesterol levels.
Other useful nutritional facts:
- Shiitake are naturally very low in calories yet pack a nutritional punch – they are high in fibre, B vitamins, and minerals;
- Shiitake mushrooms actually contain 18 amino acids – many of which are usually only found in animal products – making for a more than just tasty meat substitute.
They have a long shelf-life
Unlike many other popular mushrooms, fresh shiitake have an excellent shelf life – with the average mushroom lasting up to 2-3 weeks in a refrigerator post-harvest.
This is not only a huge plus when growing larger batches, but a great benefit if you decide to grow mushrooms commercially one day. For many mushroom farmers, shiitakes can prove to be one of the most profitable types of mushrooms to sell.
They keep on giving (many, many, high-yielding harvests)
As well as long shelf life, shiitake mushrooms are often cherished for their fruitful yields and seemingly endless harvest cycles. Shiitake logs are only inoculated once and require very little upkeep to maintain moisture within the substrate.
Once properly set up, shiitake mushroom logs can effortlessly produce flushes in an optimal environment every 4-5 weeks for up to 6-8 years!
If you’re looking for a species of mushroom that is almost guaranteed to deliver on quantity and quality time and time again with little ongoing effort, you’ll struggle to find a better mushroom.
They’re good for the planet
OK – we know what you’re thinking. This one is true of most mushrooms but still deserves a mention. Shiitake mushrooms, much like many other types of cultivated mushrooms, require very little in the way of resources during their growth.
Compared to other common homegrown produce, mushrooms consume less water, energy, and physical space than other vegetables or fruits.
Step. 1 Deciding your approach
Preparation, preparation, & more preparation.
The shiitake is what is known as a wood-decaying or decomposer mushroom, meaning that they grow on dead tree logs or plant matter.
Whilst shiitake mushrooms can grow on different types of substrate and succeed in various growing conditions, they are not as versatile as other commonly cultivated species like the oyster mushroom.
This mostly boils down to the shiitake mycelium not being as aggressive as common rival fungi or organisms in its growth.
Because of this, we must take extra precautions to prevent contamination and minimise the presence of other organisms in our substrate and growing environment.
When it comes to cultivation, shiitake mushrooms are grown most often on logs but are also grown on nutrient-rich sawdust blocks in commercial settings.
Growing Indoors vs Outdoors
First things first, you will need to decide where you wish to grow your mushrooms. Commercial shiitake are usually grown indoors using large growing bags filled with a supplemented sawdust substrate in a high-tech fruiting chamber.
Whilst an indoor facility with state-of-the-art temperature controls and air ventilation systems can provide the optimal growing environment, this requires a significant amount of resources and investment.
For most hobbyists or first-time growers, using a shiitake log will be the most practical approach.
With that said, if you live in an area where logs are difficult to source, using straw pellets or straw/sawdust in a heat-resistant bag may be a more accessible option.
Is there a noticeable difference between indoor or outdoor grown shiitake mushrooms?
Aside from greater yields expected from a commercial operation, the main difference between a shiitake log grow and a commercial indoor set-up is the turnaround time for growth.
Mushroom logs are a longer-term growing method, with an inoculation period of 6-12 months. On the other hand, mushroom logs are as low maintenance as mushroom growing can get, so it is definitely worth the investment and patience.
Selecting your substrate of choice: To log or not to log
A mushroom substrate is a growing medium in which mushroom mycelium can develop and grow – using it for both nutrition and as a platform to develop its network of hyphae (the white wool-like threads) and consequently its fruiting bodies (the mushrooms).
When selecting a substrate for shiitake, your options are somewhat limited when compared to other commonly grown mushrooms.
Other decomposer mushrooms, such as oyster mushrooms, can grow on just about any organic matter. From straw, logs, to coffee grounds, and even books; you will find the Pleurotus family growing on just about anything.
Shiitake are found naturally growing on logs, so it is best to grow them as such or a dense wood-based substrate such as a sawdust block. As mentioned above, for hobbyists or newcomers, growing shiitake mushrooms on logs will be the best way to grow your mushrooms at home.
Using a Shiitake Mushroom Growing Kit
One popular approach for beginners to start growing shiitake mushrooms is to begin with a growing kit. Unlike other types of mushroom growing kits, shiitake kits often provide you with all of the accessories and materials needed to inoculate a growing log.
Often this will include mushroom plug spawn, a drill bit/other power drill attachments, sealing wax & other assembly items. This can help remove much of the hassle of setting up your grow, whilst helping to maximise your chances for success.
If you’re looking for a quick start or smoother set-up, be sure to check out our shiitake mushroom log kit – complete with step-by-step instructions.
Buy Now Shiitake Mushroom Growing Kit From £19.99Selecting Your Spawn: Considering Your Growing Environment
Selecting the right strain of shiitake is a critical step towards producing a rewarding harvest.
Interestingly, different shiitake mushroom strains often produce mushrooms that are almost identical in appearance, taste and nutritional content. The selection of strain is more important for finding a type best suited to your growing conditions.
Our strains are selected for optimal growth in conditions most common in the United Kingdom.
If you’re in need of spawn, check out our shiitake plug spawn or for commercial growers see our range of shiitake strains sold in grain form.
Buy Now Shiitake Mushroom Plug Spawn From £7.50Step 2. Preparing Your Shiitake Mushroom Substrate
Preparing a Growing Log
If you are growing your shiitake mushrooms on a log, you will not need to pasteurise or sterilise your substrate. However, there are other steps you should take in choosing the right substrate. We will walk you through selecting the best log throughout this section.
Selecting the right log
It’s incredibly important to select the healthiest possible tree when choosing your mushroom log. The tree should be disease-free and show no signs of hosting other forms of fungi. If the tree shows any signs of infection or fungal inhabitants – avoid it at all costs.
It may be tempting when sourcing your log(s) to pick up a dead log laying on the woodland floor – but it’s really not worth it. These trees will likely be occupied with competing organisms that could outcompete your mushrooms.
We’re currently in the process of putting together our complete guide to growing mushrooms on logs which will cover the following in greater detail, but this should give you enough to choose the right log. Sign up for our newsletter to be notified when it is ready!
Hardwoods are the best type of logs for growing shiitake. It is best to find a hardwood that is local to your area, but ideal species include:
- Oak
- Chestnut
- Alder
- Hornbeam
- Ash
- Birch
What size should the log be?
For the diameter of the log aim for a tree 20-35cm in diameter. For the length, we would recommend something between 0.5-1m.
You can grow on much larger logs, but remember that the bigger the log, the longer the incubation period. This is because it will take the mycelium longer to develop through the timber.
Cutting the log to size
With the proper safety equipment, precaution and a handsaw, cut your log to your desired length. You’ll need to place your growing log in safe storage for around 2 weeks to allow for any natural fungicides to perish.
Be sure not to leave your log for any longer than 5-6 weeks as you may find that the log loses too much moisture and is unsuitable for growing purposes.
When is the best time to select and inoculate your log?
Logs for shiitake growing are usually best inoculated between autumn to late winter when dormant trees have the greatest reserves of sugars and other nutrients that feed the mycelium.
Preparing Sawdust or Straw
Straw and sawdust are popular substrate choices for a wide number of mushroom species and shiitake are no exception. If you opt for this route, you will need to pasteurise your substrate.
Pasteurising your substrate
Pasteurisation or sterilisation is essential in almost all types of cultivation of mushrooms.
Whilst it is true that mushrooms are perfectly capable of surviving within well-populated and competitive ecosystems in nature, the mushrooms that grow in the wild rarely produce the quality and size of yields that can be achieved when cultivated in optimal conditions.
Improving the biological efficiency of mushrooms through the reduction or removal of competing organisms is paramount to maximising the yield and quality of your mushroom harvests.
What is the difference between Sterilisation and Pasteurisation?
Pasteurisation, technically speaking, is any method that reduces the number of competing pathogens in the substrate.
These methods include heat pasteurisation (with temperatures above 80-85 degrees Celsius) and cold water lime pasteurisation that significantly raises the pH level of the water – killing off any potential substrate contaminants.
Sterilisation on the other hand, whilst sharing similar techniques to some forms of pasteurisation, is the complete elimination of competing organisms or pathogens.
The key difference between pasteurisation and sterilisation in mushroom cultivation is that pasteurisation reduces pathogens and sterilisation eliminates all of them. Pasteurisation is the most popular method for hobbyists as it requires less time, resources and equipment. Sterilization is most often used in the production of mushroom spawn as opposed to substrate preparation.
How to Pasteurise the Substrate
To pasteurise your substrate with hot water, you can use a sterilised heating container – such as a large cooking pot, or a heat-resistant bag.
If using a heating container, ensure to keep your substrate submerged in hot water (above 80-85 degrees Celsius) for 2 hours.
If using a heat-resistant bag, submerge your substrate directly in the bag – in our kits, we usually recommend 3 litres of boiled water and to tightly seal the bag for up to 8 hours until completely cooled.
Once cooled, cut the corners of your bag and allow it to completely drain – you want to retain some moisture in the substrate but without promoting mould growth. If you squeeze your substrate mixture, you should only see a few drops of water release.
Preparing Straw or Wood Pellets
If you are planning to use sawdust pellet spawn, you will need to soak the pellets in fresh, clean water for around 20-30 minutes.
You will not have to sterilise or pasteurise them as the pellets are pasteurised during the manufacturing process to eliminate competing bacteria or fungi – rehydration is the only step you’ll need to take.
Step 3. Inoculating Your Substrate
Inoculating Your Growing Log
Depending on the size of your plug spawn dowels, you will want to use a drill bit that ensures a tight fit for the plug spawn.
Marking out and drilling your inoculation points
There are no rules in how you should mark out your drill holes per se, but we recommend using the full length of the log with holes placed every six inches to allow for optimal growing space.
We also recommend allowing for 3-4 inches between rows when rotating the log and drilling further holes – just be sure to stagger your rows for space!
Top Tip:Use some electrical or masking tape to mark the length of your dowels onto your drill bit. This will help ensure you are drilling holes with consistent depth for your plugs.
Inserting your plugs
Once your holes have been drilled, it’s time to insert your spawn dowels and hammer them flush with the log.
Protecting your plug spawn with a wax sealant
Now that your plugs have been inserted, you’ll want to use a wax sealant to cover each of the dowels to help retain moisture and prevent unwanted visitors from entering.
Simply take your wax block or wax pellets and slowly warm them in a saucepan or other heating container. Once completely melted, begin covering your drill holes across the growing log with a clean sponge.
Top Tip:If you are based in a warmer climate than us in the UK, or are particularly exposed to windy conditions, it is a good idea to use your sealing wax to coat the ends of your log to maximise the retention of moisture.
Inoculating Sawdust or Straw
The first thing you will need to do before inoculating your substrate is to make sure your working area is clean – take care to disinfect and wipe surfaces, sterilise any utensils, and thoroughly wash your hands.
It is critical at this stage that you take these precautions to prevent contaminating your substrate.
Once your working area is clean, you will need to also make sure your substrate has the optimal moisture content. To check this, simply squeeze your substrate mix – only a few drops of water should release.
Carefully mix your mushroom spawn and substrate mix together. It is easiest to do this in a large sterilised container before placing it into your growing bag. Ensure the spawn and substrate are well mixed to help the spread of the mycelium.
Once properly mixed, place your spawn/substrate mix into your growing bags and tightly seal using tape, clips or a rubber band.
Step 4. The Incubation Period
With the bulk of the preparation out of the way, it’s now almost time to take a little breather and allow your fungi to do its thing!
Depending on your growing approach, the incubation time period will vary quite a bit. One thing is for sure, shiitake mushrooms have a much longer incubation period than other varieties of mushrooms.
To make sure your efforts have not been made in vain, follow these steps to get the most out of your incubation.
Incubation for Growing Logs
For those growing on logs, the incubation period will take somewhere between 6-12+ months – depending on the size of the log. Here are some top tips for maximising your incubation phase.
Elevate the Growing Log off of the ground
Using some clean bricks, timber or blocks, prop your growing log off of the ground to prevent any competing organisms or surface dwellers from entering your substrate.
Avoid Direct Sunlight and Use a Breathable Covering
Be sure to keep your log out of direct sunlight whilst incubating and consider using a breathable material such as shade netting or mesh tarp to retain moisture without promoting mould growth.
Remember to Water Your Log
If you’re like us in the UK, there are no shortage of rainy days (despite the odd heatwave). With this in mind, it is important to ensure your log maintains moisture throughout incubation.
In moist climates like ours, this may be a rarer task but it is important to water your log for 10-20 minutes if you have gone without rainfall for a week or longer. Remember that this is to maintain moisture – you’ll need to change your approach in the winter and avoid watering when temperatures fall below freezing. This is to avoid any potential damage to the log.
Incubation in a mushroom growing bag
How to know when incubation is done?
Shiitake are different to other types of mushrooms in that the mature mycelium is not your traditional white mycelium but brown in colour. The colonisation of your substrate can take between 2-4 months to complete, but it is important to allow for full growth for optimal yields.
Step 5. Shiitake Fruiting
Fruiting on logs
Whilst shiitake mushrooms will fruit without intervention when they are ready, you may wish to take extra steps to help the process along.
Shocking your growing log into fruiting
“Shocking” (also known as “initiating”) your substrate is a common technique used to speed up the process and to “shock” your mushrooms into fruiting.
Shocking works by exposing the growing log to a sudden change in temperature and moisture – usually by submerging the log in cold water for up to 24 hours.
How do I know when my growing log is ready to shock?
It is difficult to know when your log has been fully colonised just by looking at it. We recommend waiting between 9-12 months to be sure your mycelium has fully colonised the growing log before shocking it.
How do I shock the growing log?
To shock your growing log into fruiting shiitake mushrooms, you will need to submerge it in clean, cold water. There is no right or wrong way to do this, as long as you’re able to submerge the log for 24 hours. Popular methods include paddling pools, large water collectors, bathtubs or even a relatively clean pond.
Once you’ve soaked your growing log, return it to the spot you used for the incubation period and position it in an upright position for optimal growing space.
How long will it take for mushrooms to fruit?
Once you have shocked your mushroom log you should expect to see your first mushrooms fruiting within a few days or up to 2 weeks.
Fruiting in bags
Once your substrate has been completely colonised and the mycelium is brown in colour, you may open the bag and position it in a space with high levels of humidity and access to fresh air.
Retaining Moisture
At this stage, the only upkeep you will need is to ensure your growing environment retains moisture. Using a sterilised water spray bottle, mist your mushroom bag several times a day – shiitake mushrooms are a “thirsty” mushroom and will grow best when having access to plenty of water.
How many harvests can I expect?
Depending on the size of your growing bags and whether you used substrate supplements or a casing layer, you may expect up to 5-7 flushes from each mushroom bag.
Step 6. Harvesting Your Shiitake Mushrooms!
The moment has arrived and you’re ready to eat the literal fruits (well, technically fungi) of your labour.
How to tell when shiitake mushrooms are ready to harvest
Deciding when to harvest your shiitake mushrooms is somewhat a matter of personal preference, but we recommend harvesting your mushrooms whilst the mushroom caps are still slightly curled inwards.
Harvesting your shiitake mushrooms before the caps flatten or curl outwards will ensure you have a delicious and tender mushroom.
How is best to harvest the mushrooms?
The best way to harvest your shiitake mushrooms is to use a pair of scissors or a knife to cut the base of the mushroom stem flush with the substrate. This not only prevents pieces of your substrate from being collected and possibly entering the gills of the mushroom but also prevents any potential contamination for future flushes.
How is best to store shiitake mushrooms post-harvest?
Fresh mushrooms
If you plan to enjoy your mushrooms fresh, you will want to immediately refrigerate your shiitake to maximise its shelf-life. When storing mushrooms in general, it is best not to cover them with cling film or foil as this can promote excess moisture and accelerate decomposition.
Dried mushrooms
Drying shiitake mushrooms is a popular way to enjoy the mushroom as well as drastically extending their shelf life – a super useful technique if you have produced a surplus.
A quick note – if your mushrooms have dirt on them, use a brush or dry cloth to remove them. Adding additional moisture at this stage will make the drying process less effective and frankly, a pain!
The drying process can vary from simply placing the whole (or halved) mushrooms in direct sunlight to dry, to using a form of dehydrator for an easier and more effective result.
You don’t necessarily need to have any fancy equipment to do the latter, as most modern home ovens will provide a low-temperature setting suitable for dehydrating foods.
Using a low heat setting (no higher than 60 degrees Celsius), place your mushrooms on a wire grill or rack without overcrowding the tray. This could take anywhere between 5-10 hours depending on the size of your mushrooms, their moisture content, and the temperature of your dehydrator/oven. Just be sure to regularly check your mushrooms so they don’t burn or dry out too much!
Dried shiitake mushrooms should have a slightly crispy texture.